 Watchletic
How to run negative splits on Apple Watch

Photo by Steven Lelham
If you're aiming to get a new PR (personal record) in your next race it's important to have a pacing strategy in mind beforehand.
One trick that many professional runners use to get faster race times is to split up their runs in so called negative splits. That means starting a little bit slower than your intended pace and kilometer by kilometer, or mile by mile, slightly increase that pace until at the end you're running slightly faster than your intended pace. That way you're not burning yourself out by starting too fast.
Garmin's PacePro on Apple Watch?
For a long time the best way to setup splits with a running watch was to use Garmin's PacePro feature. But now you can get a similar setup with Apple Watch by using Watchletic!
Whether you want to run negative or positive splits, using a reference route for hill effort calculations or just plain 1km/1mi splits, I'll show you how you can setup all variations in this post.
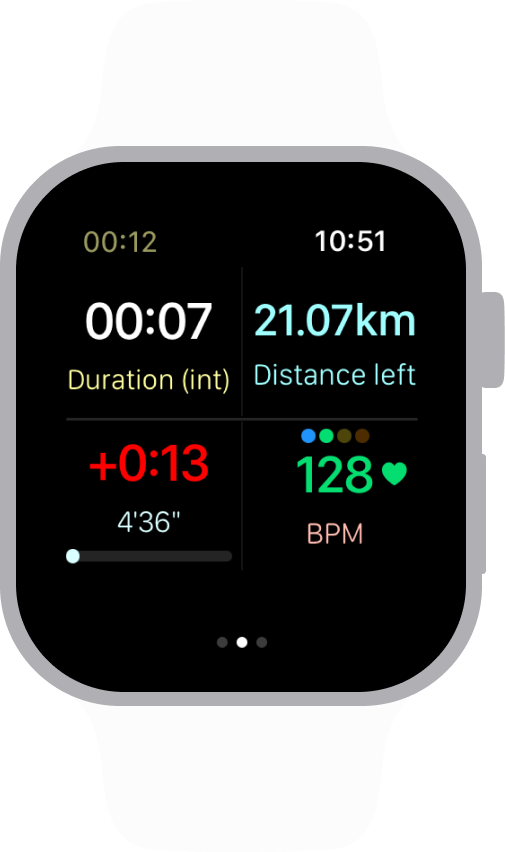
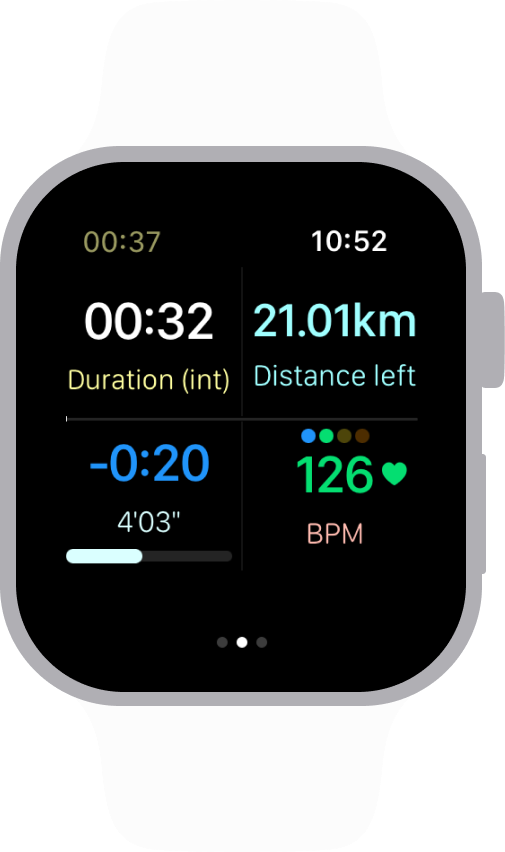
This is how it will show your current pace and how much faster or slower than your current target pace you're running. Notice also the progress bar showing how long until your next pace split.
Setup negative or positive splits
First of all, if you're unsure how to setup custom workouts with Watchletic, first read this blog post.
With that out of the way, here are step by step instructions how to setup splits:
- Select Pace Splits as Target Type for your workout part.
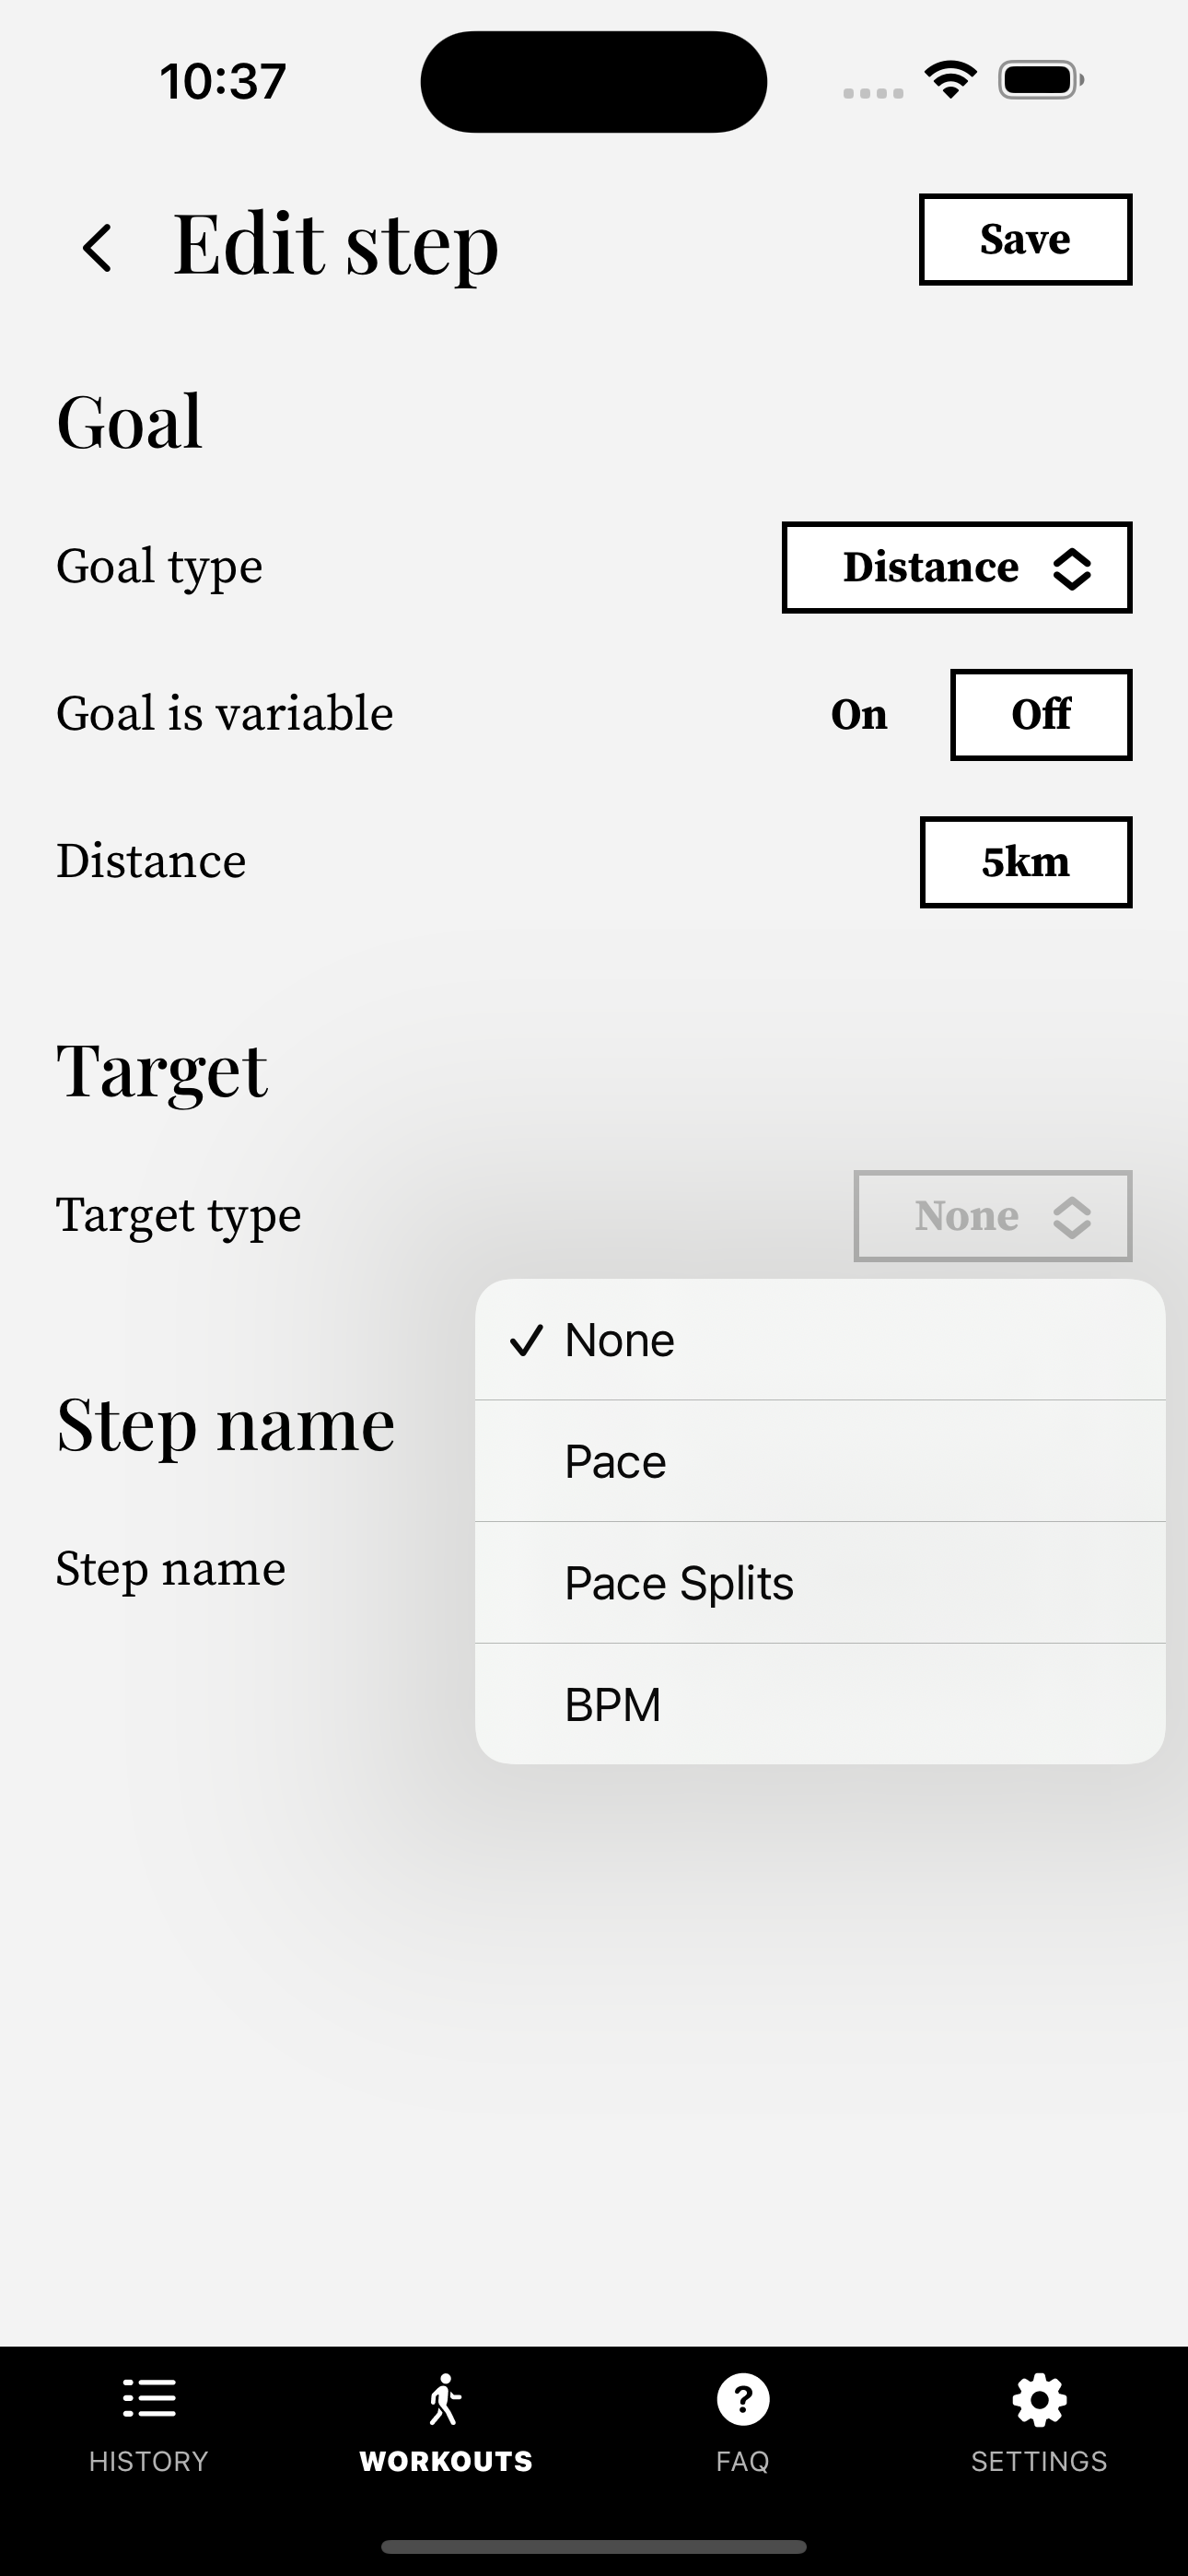
- You now get a bunch of additional fields. A pacing strategy requires both a distance and a duration so now you can set both.
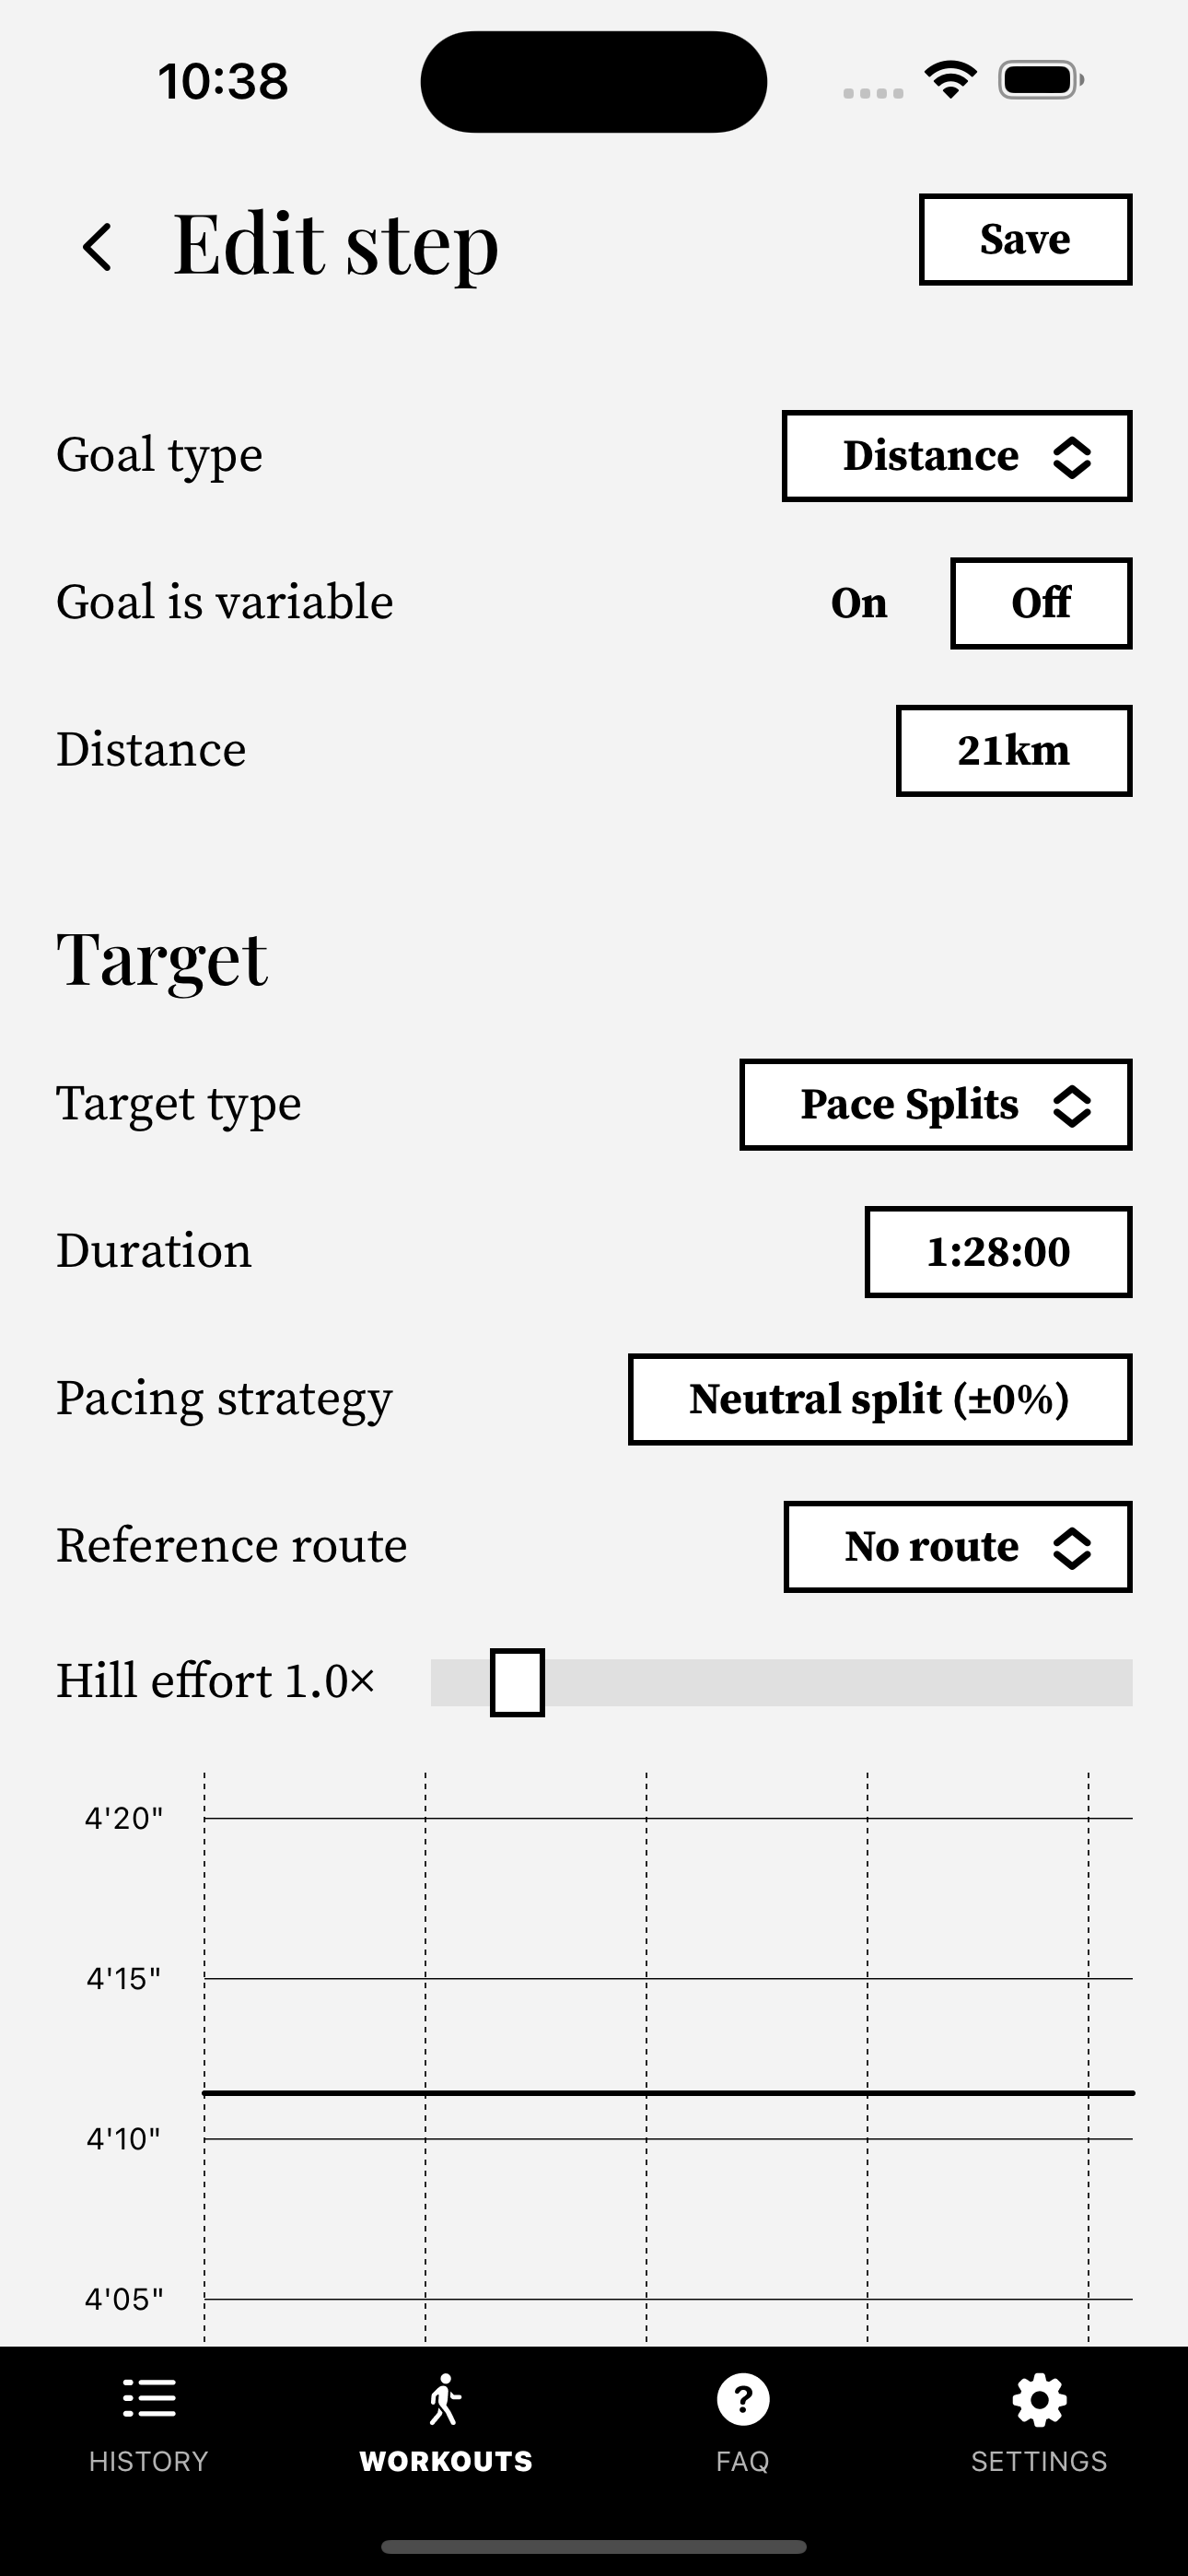
- If you open Pacing Strategy you can select the amount of positive or negative tilt on your splits. Notice how the pace split graph changes as you change amount.
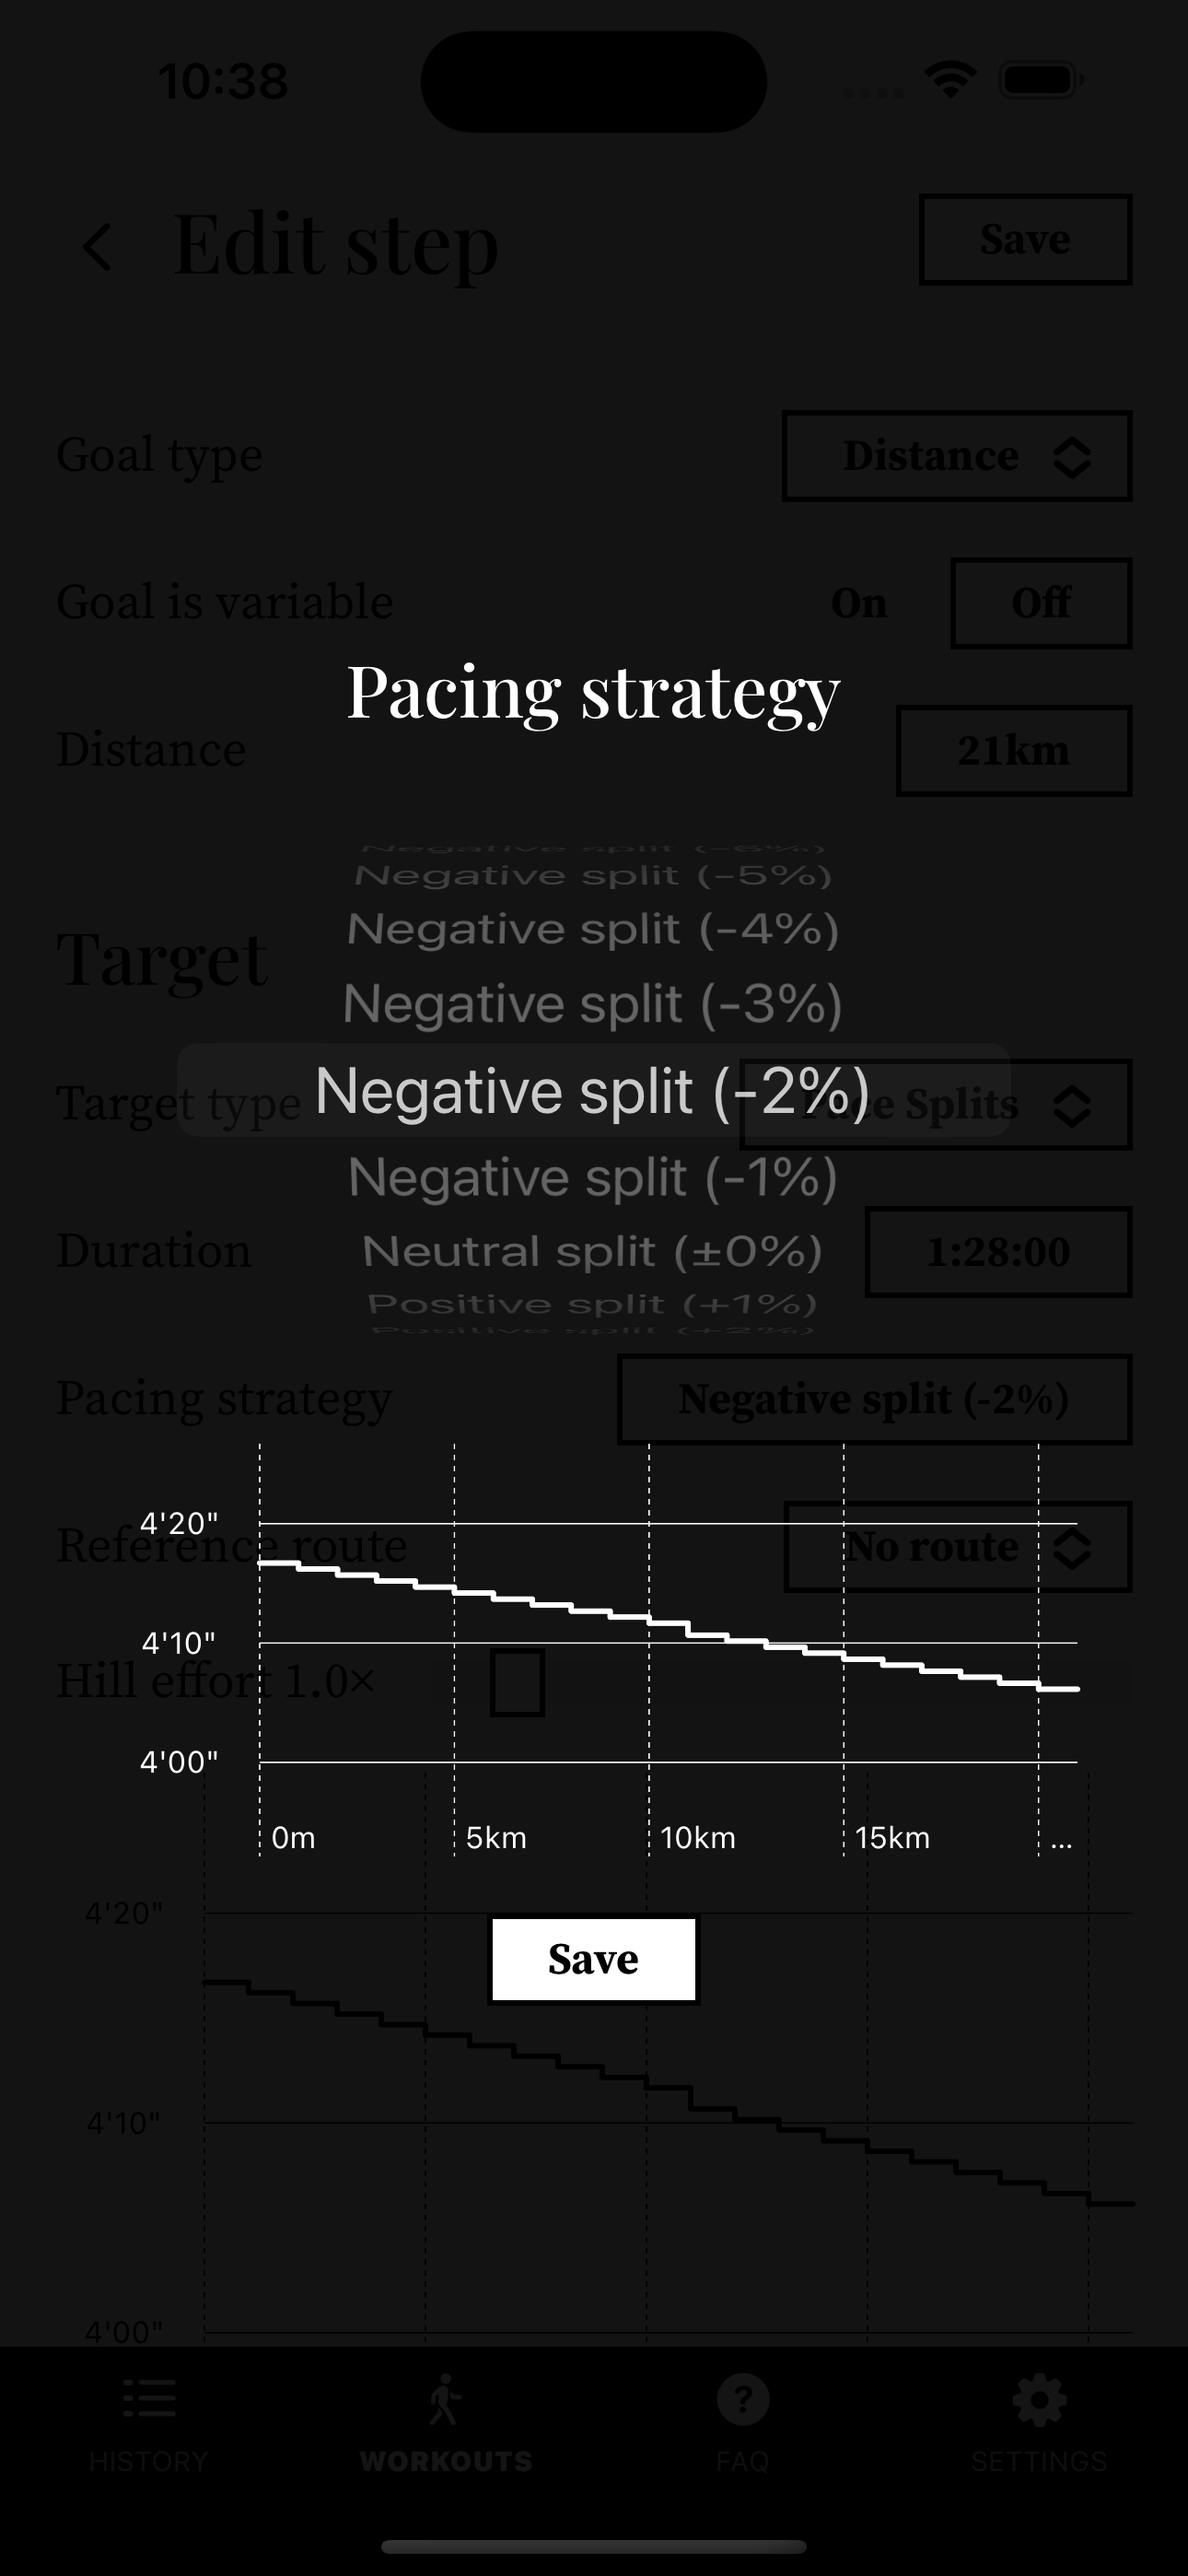
- That's it! Just save the workout and you'll be able to run with these suggested paces on your Apple Watch.
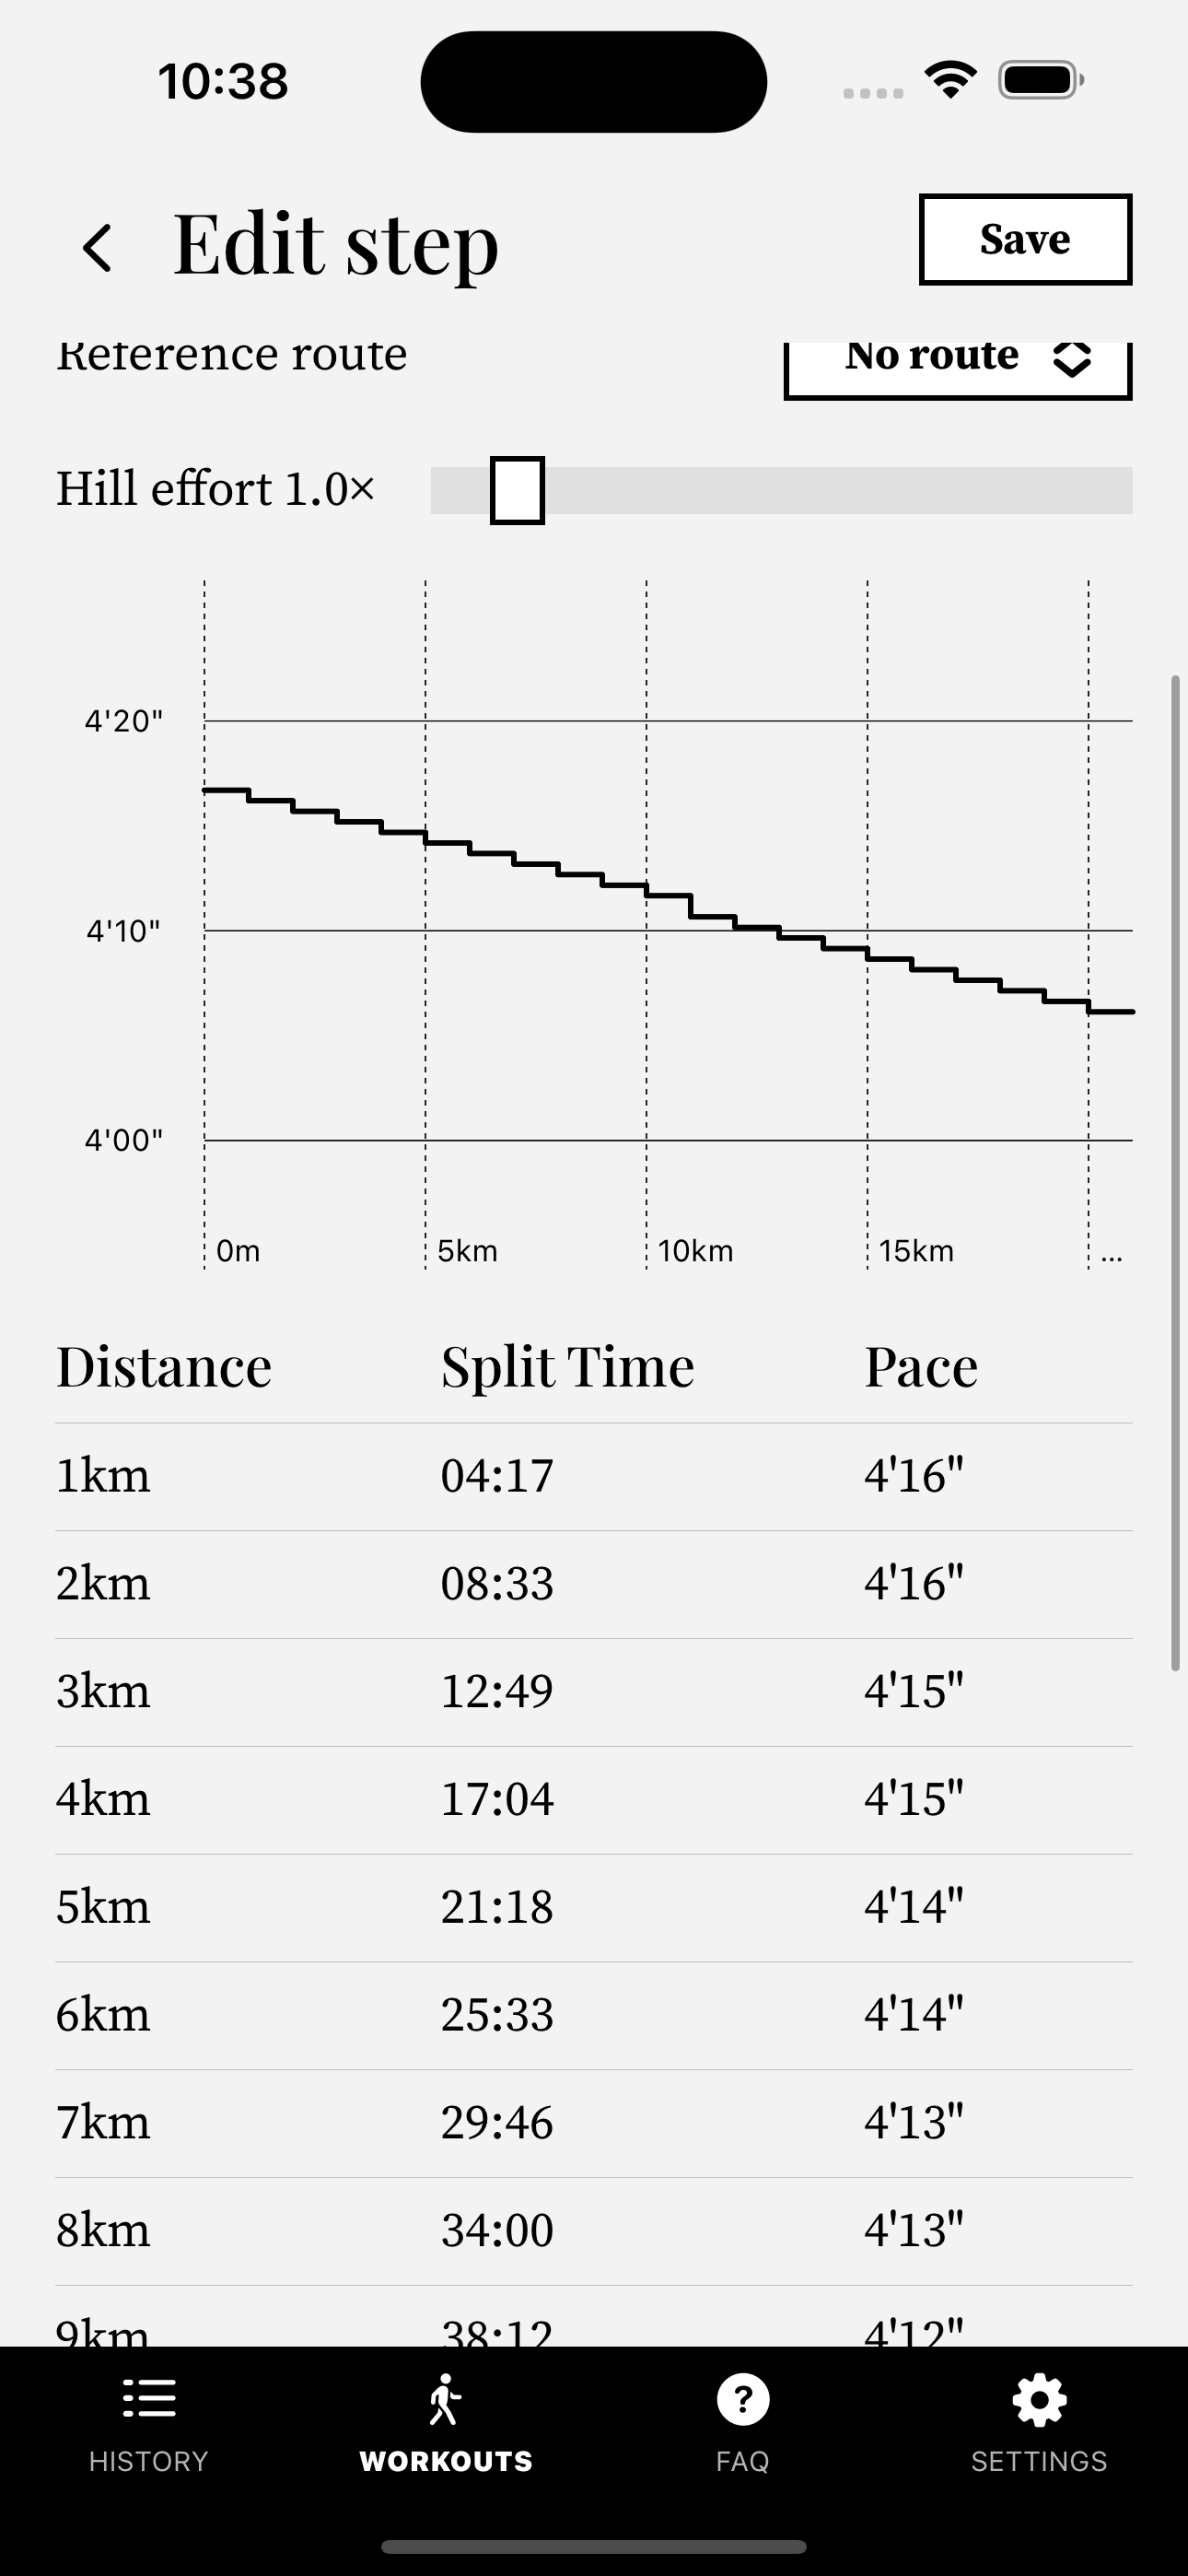
Use a reference route (GPX file) for hill effort
If you want to run a route where you have a GPX file you can use that file to let Watchletic take hills into account when calculating pace splits to make sure you can run a little slower on uphills and still finish your race at your goal time.
I'll be using a GPX file provided by Göteborgsvarvet, a half-marathon in my home town of Gothenburg.
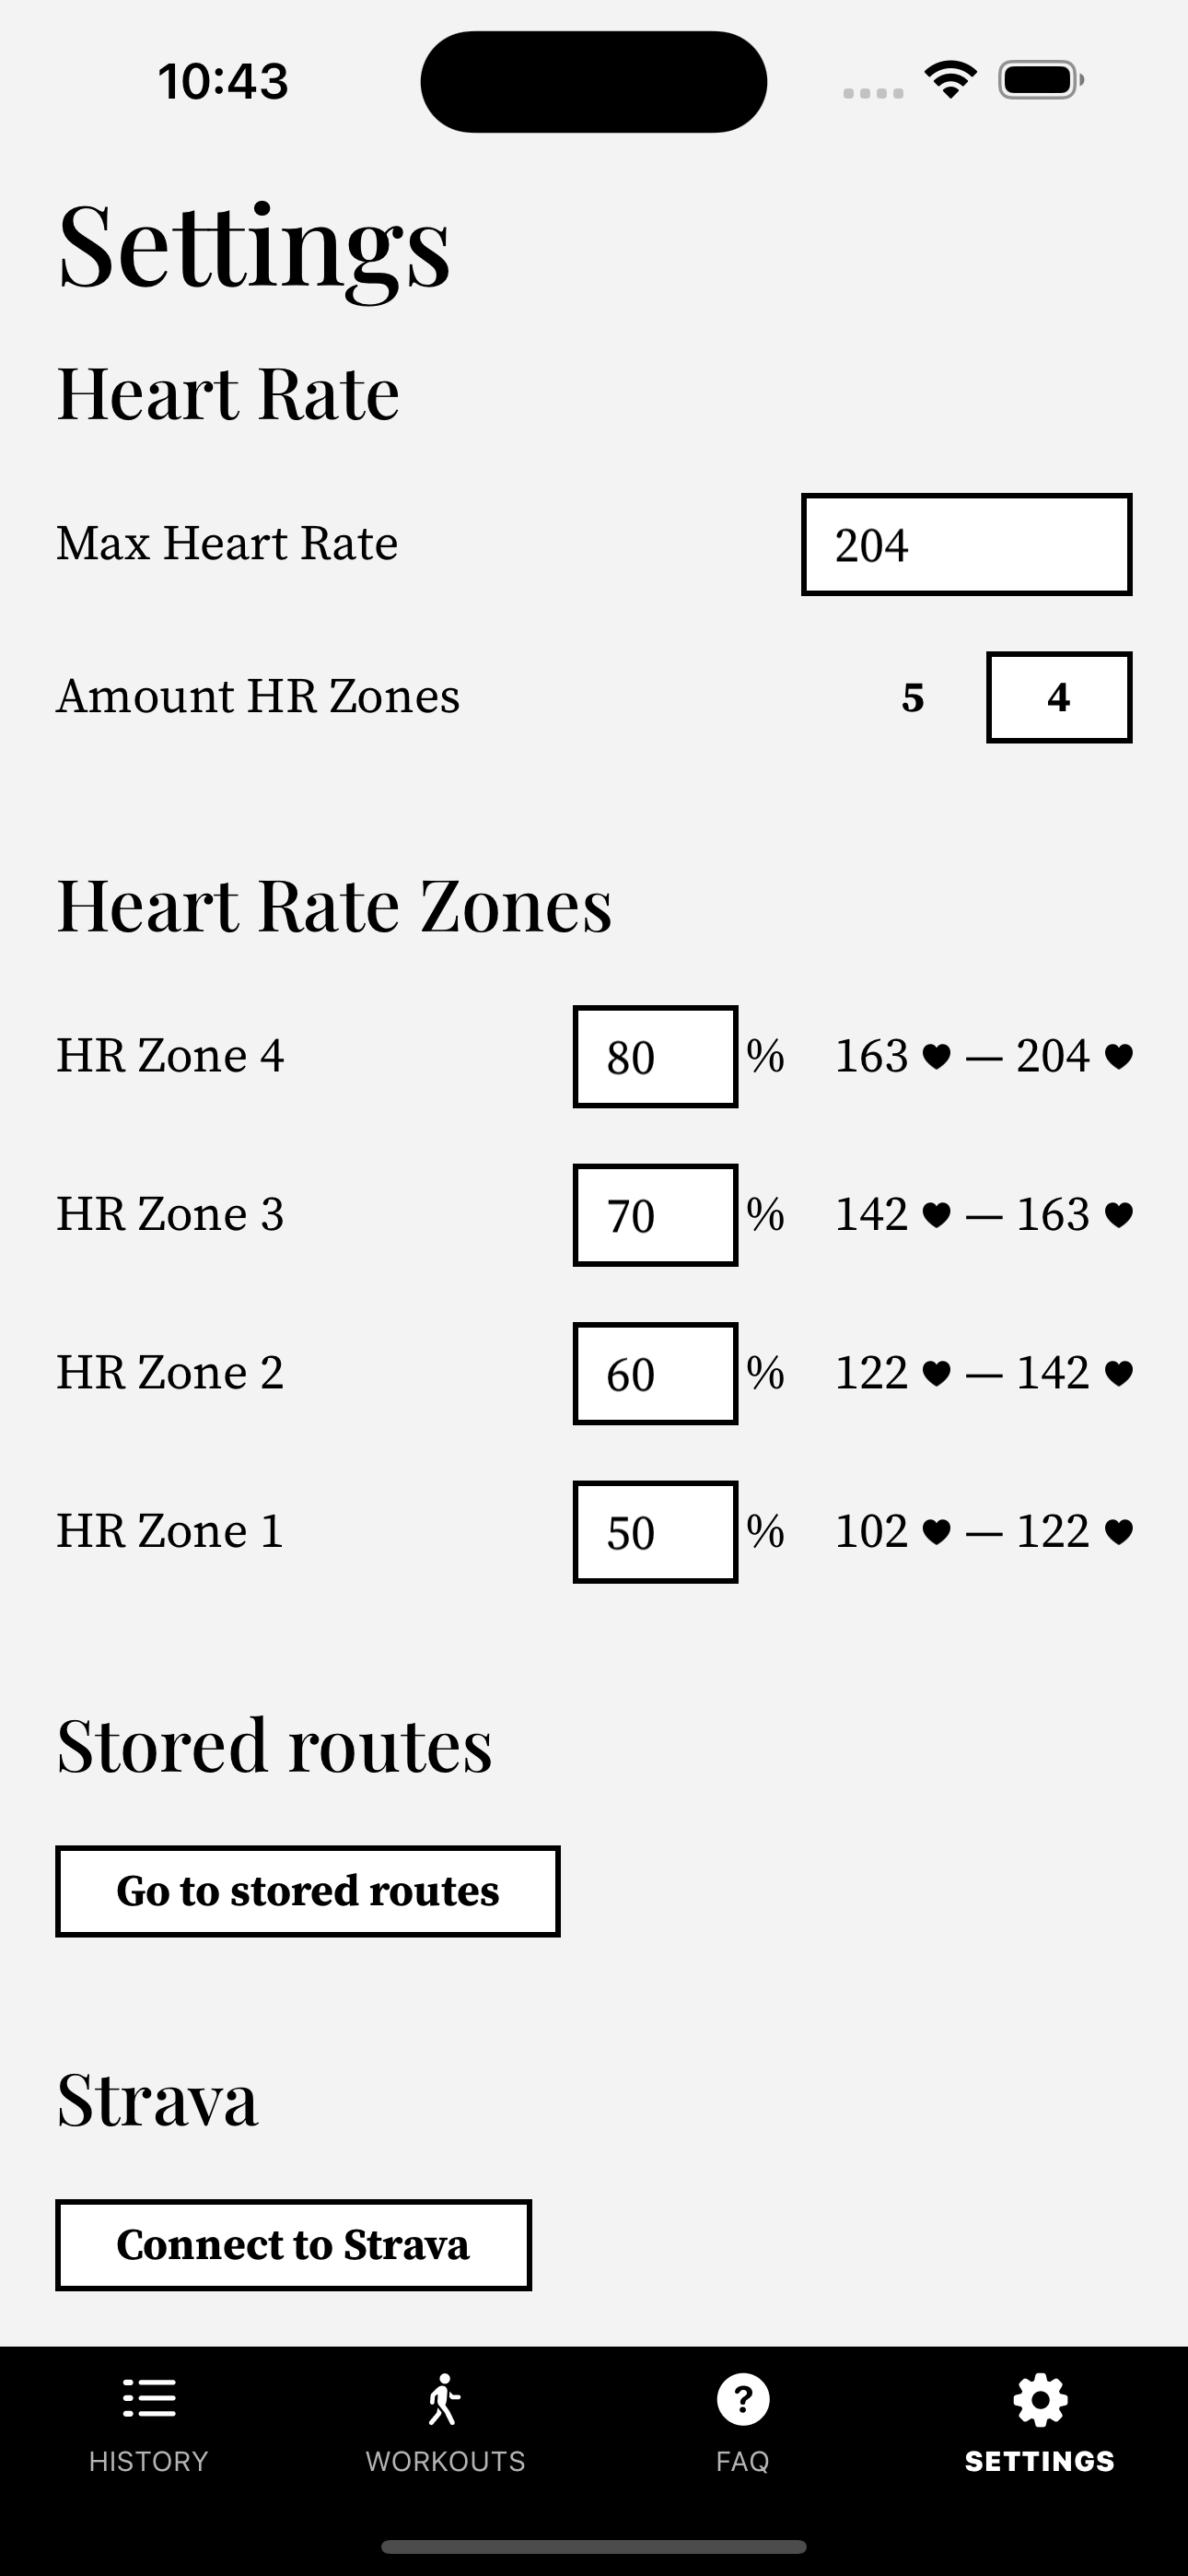
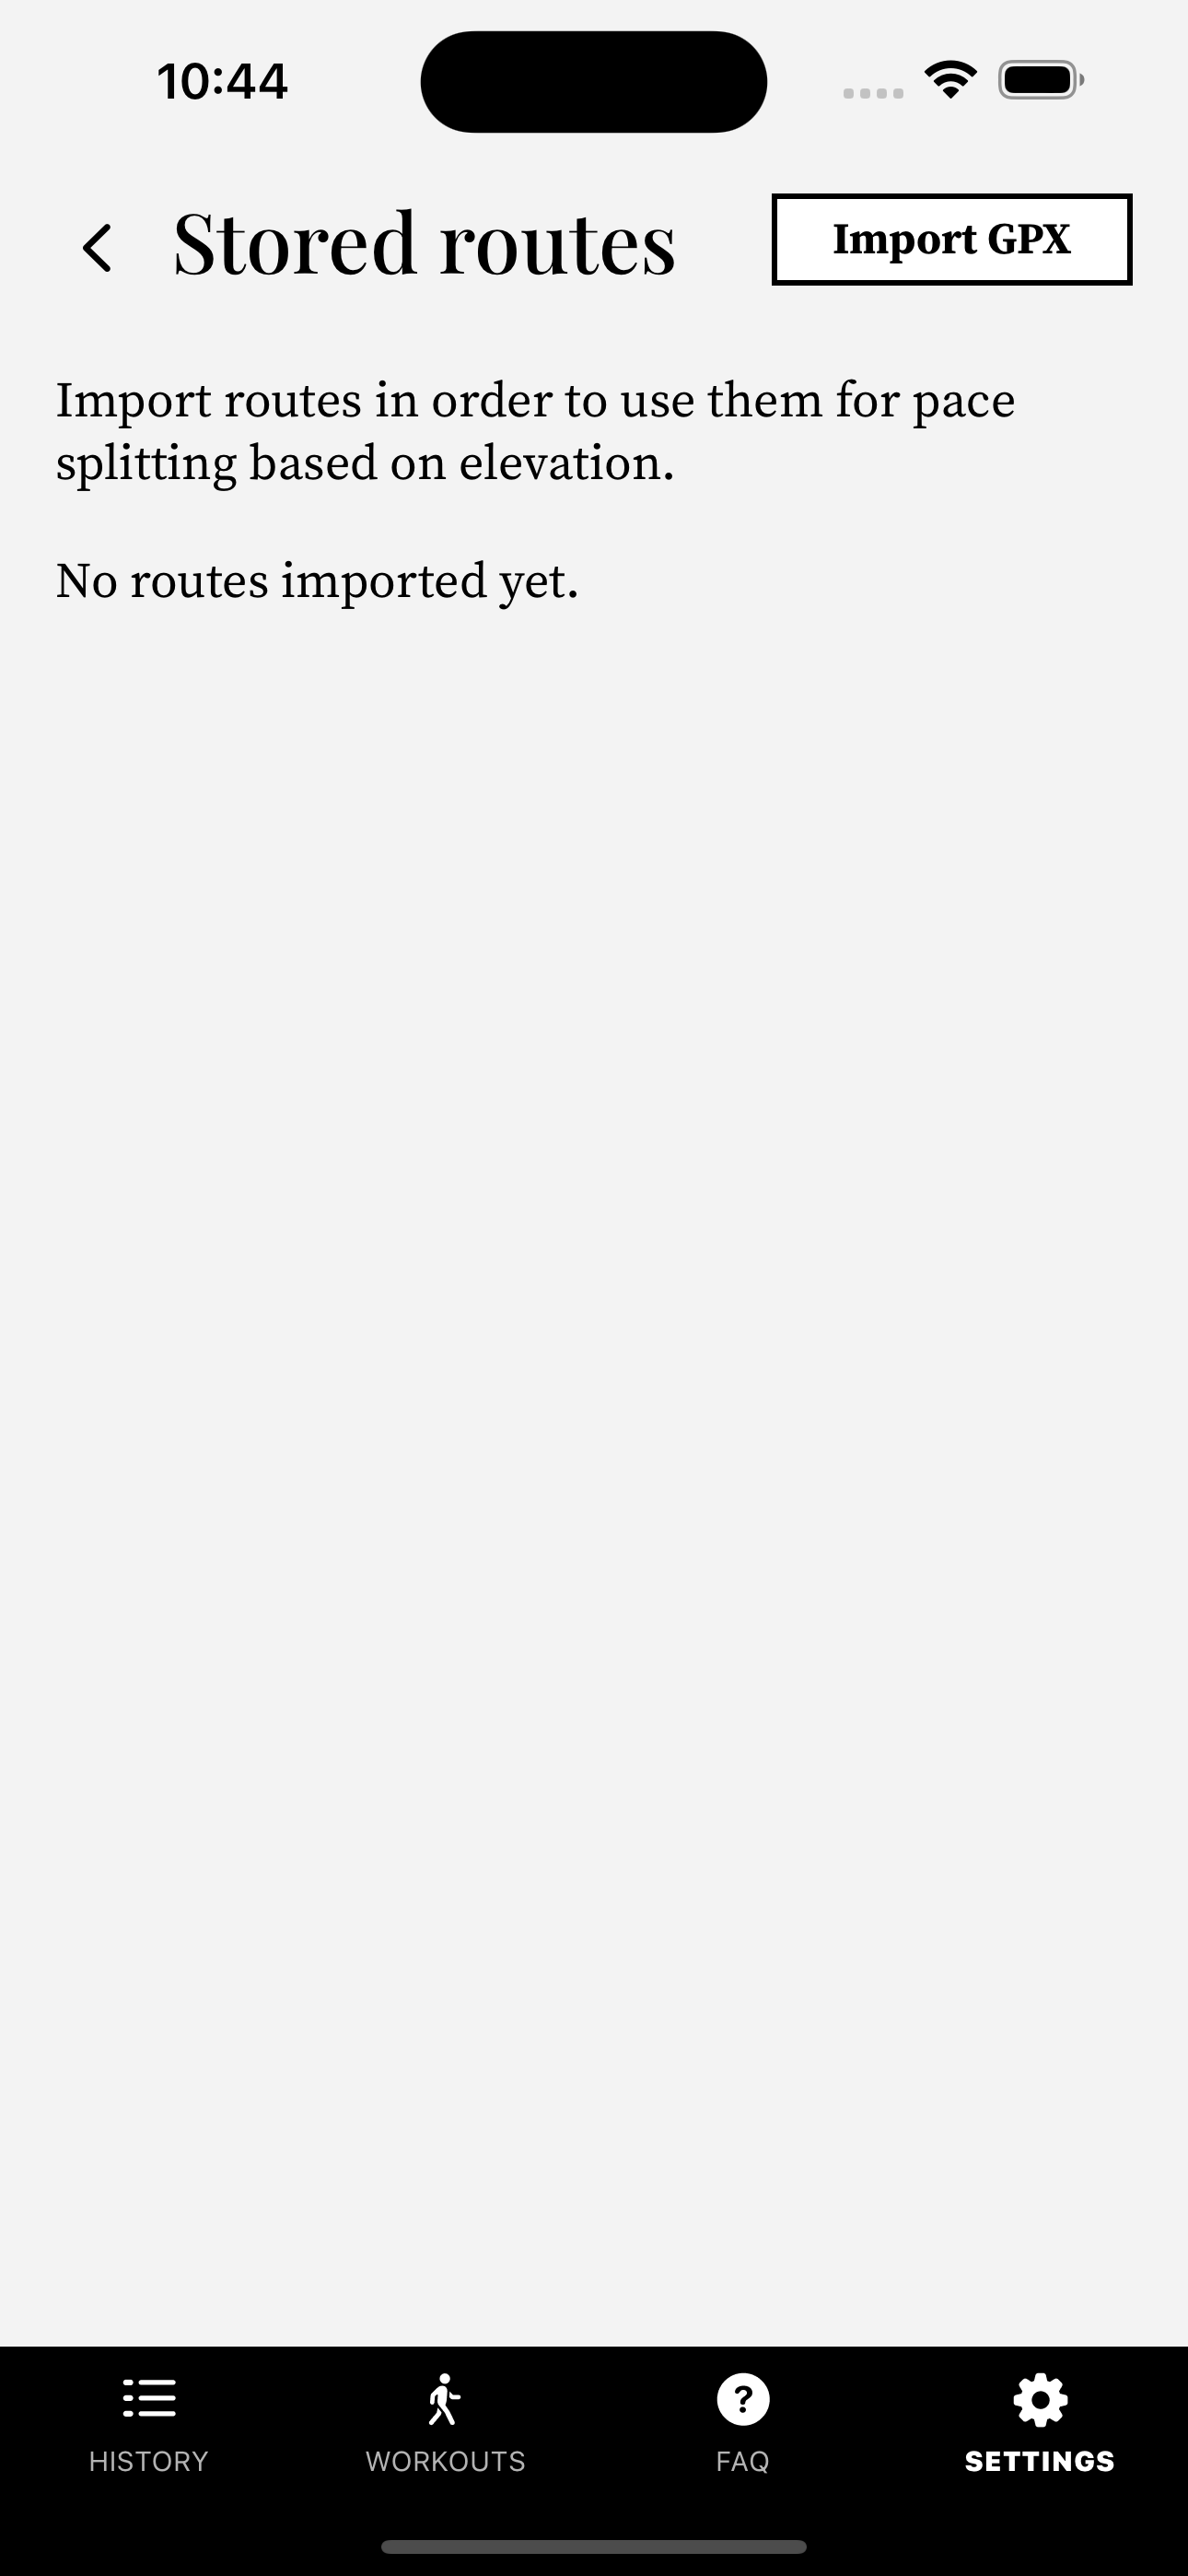
- To use a reference route you first need to download a GPX file from somewhere, then go to Settings, scroll down to Stored Routes and click "Go to stored routes"
- Once there click on Import GPX and find your GPX file.
- Once imported you can view the track, and see what uphills (green) and downhills (red) Watchletic recognized.
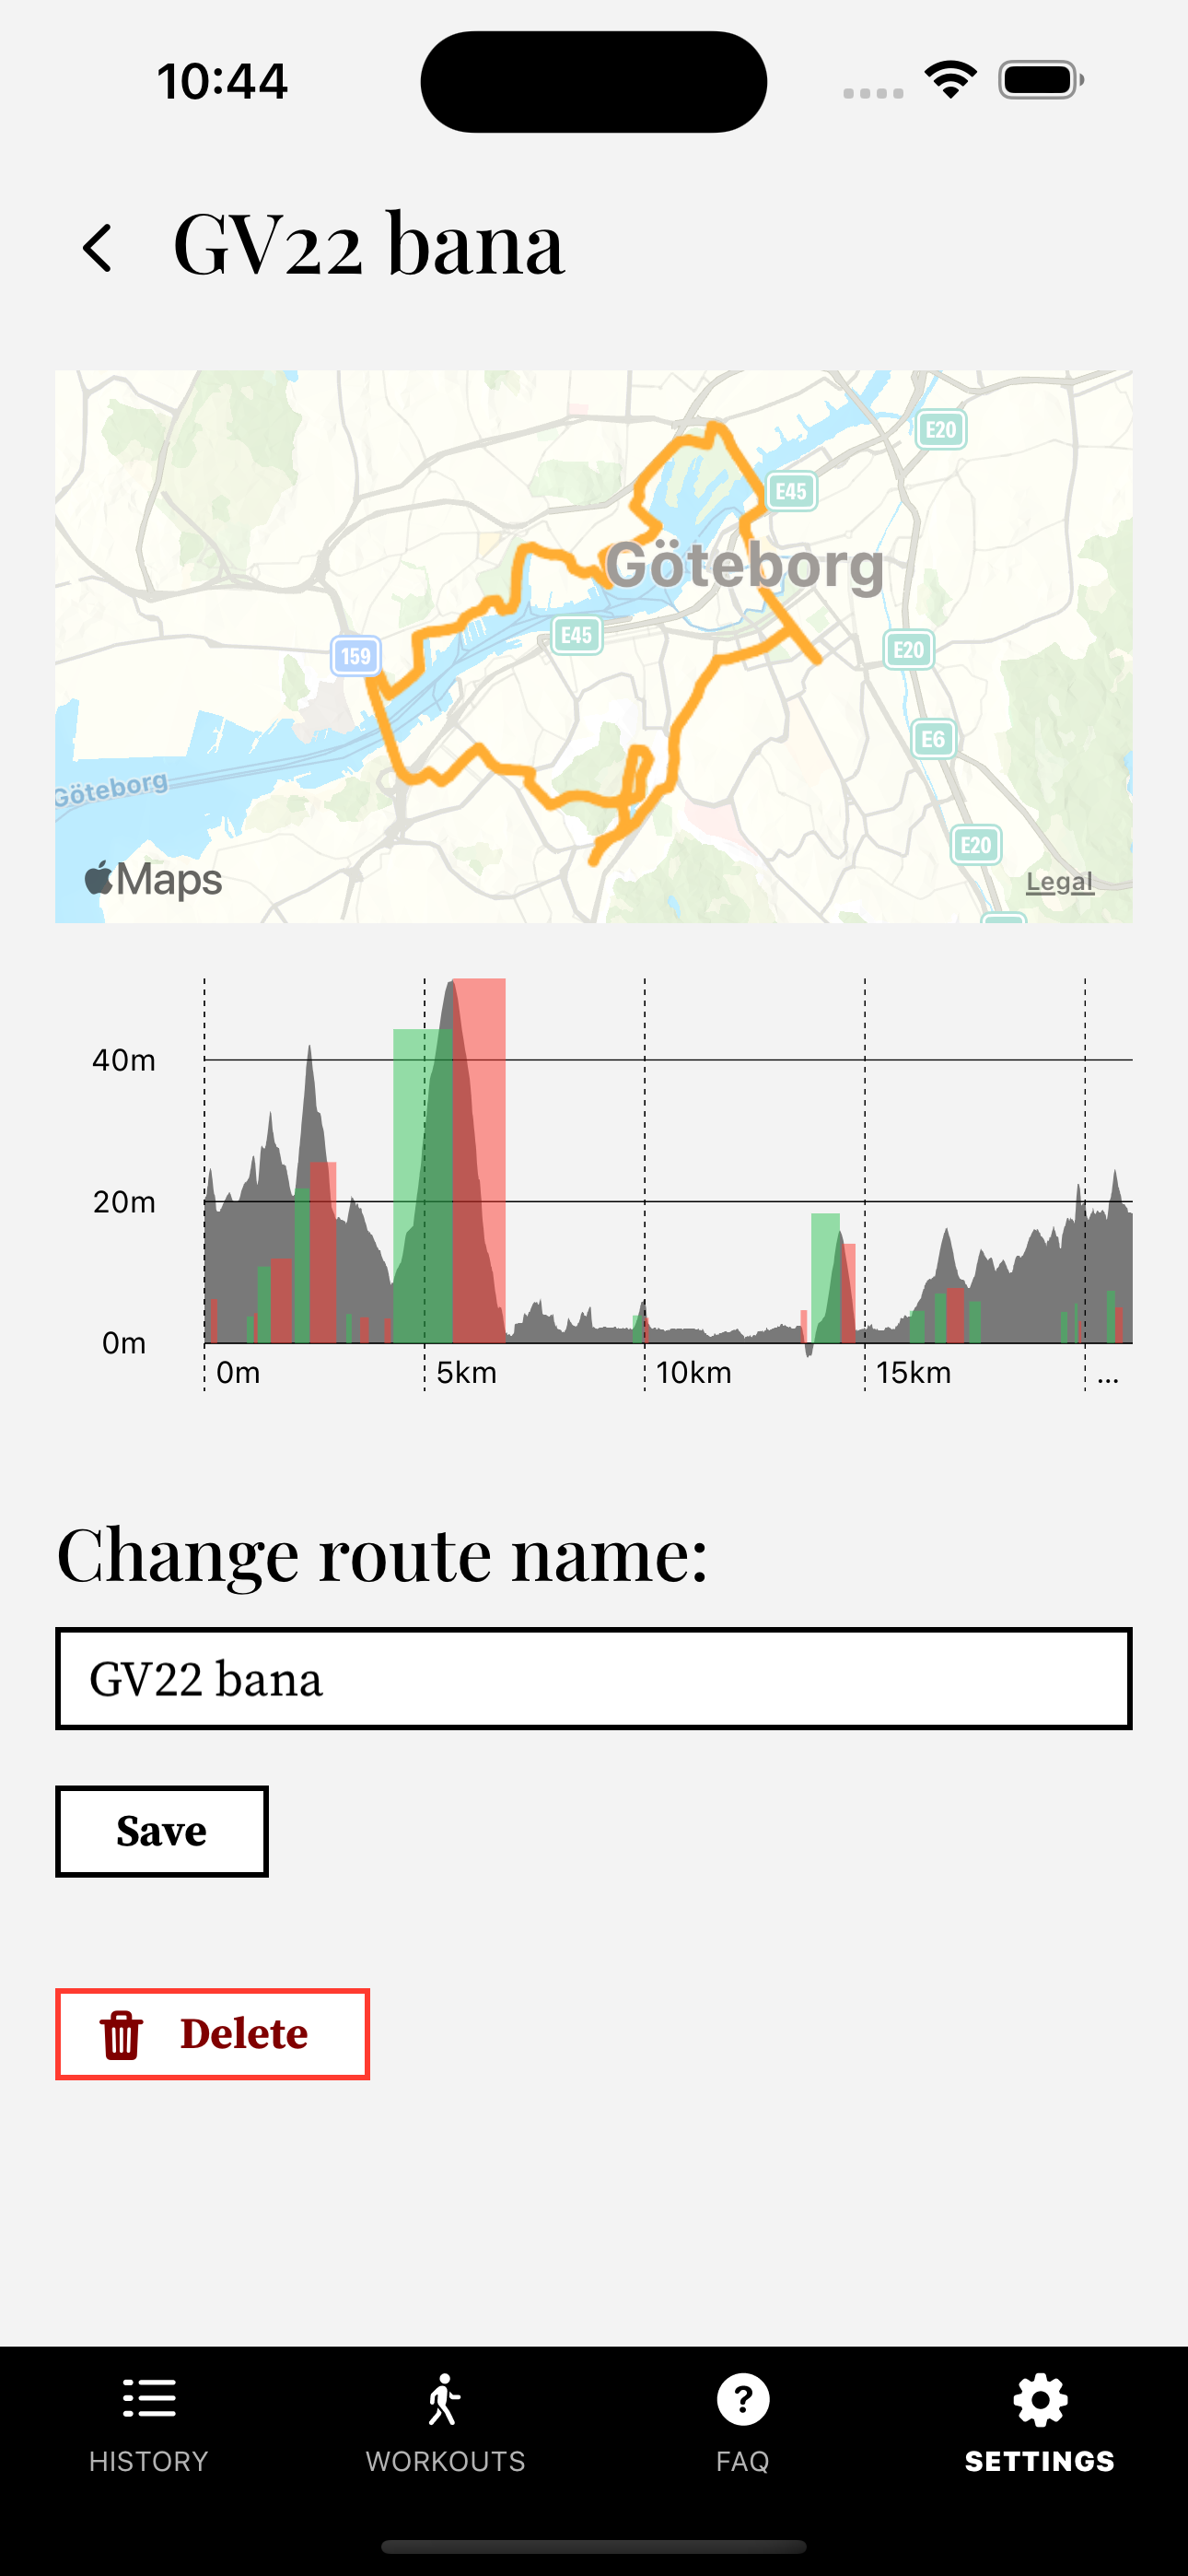
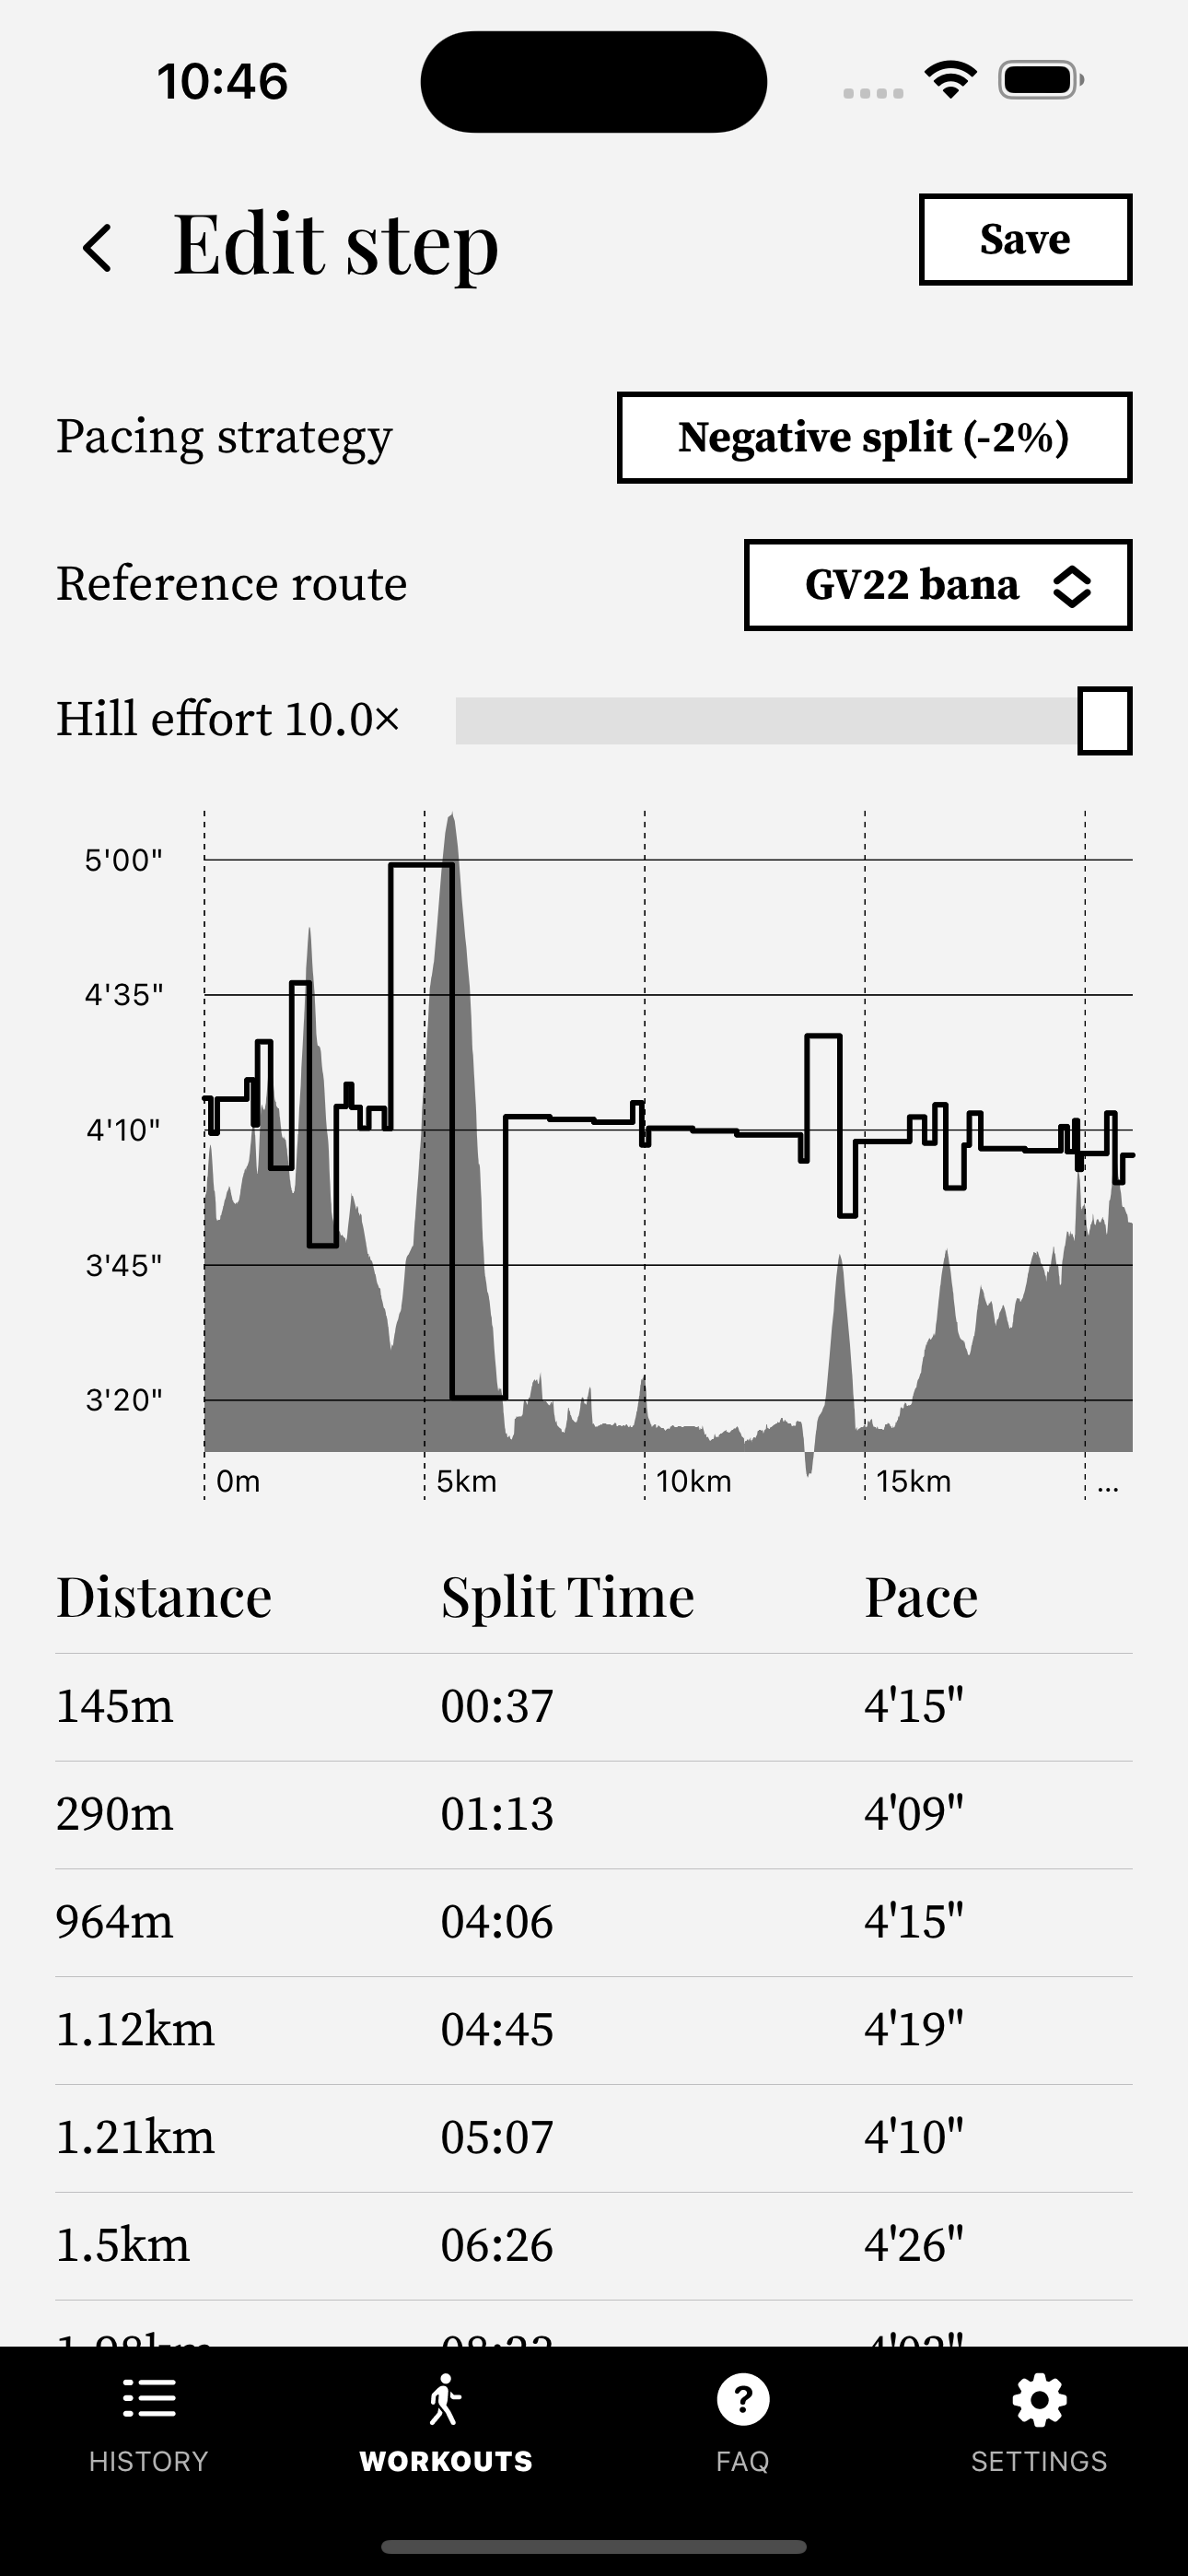
- Now go back to your workout, you should now see the imported route (in this case, "GV22 bana"). Select the route under Reference Route.
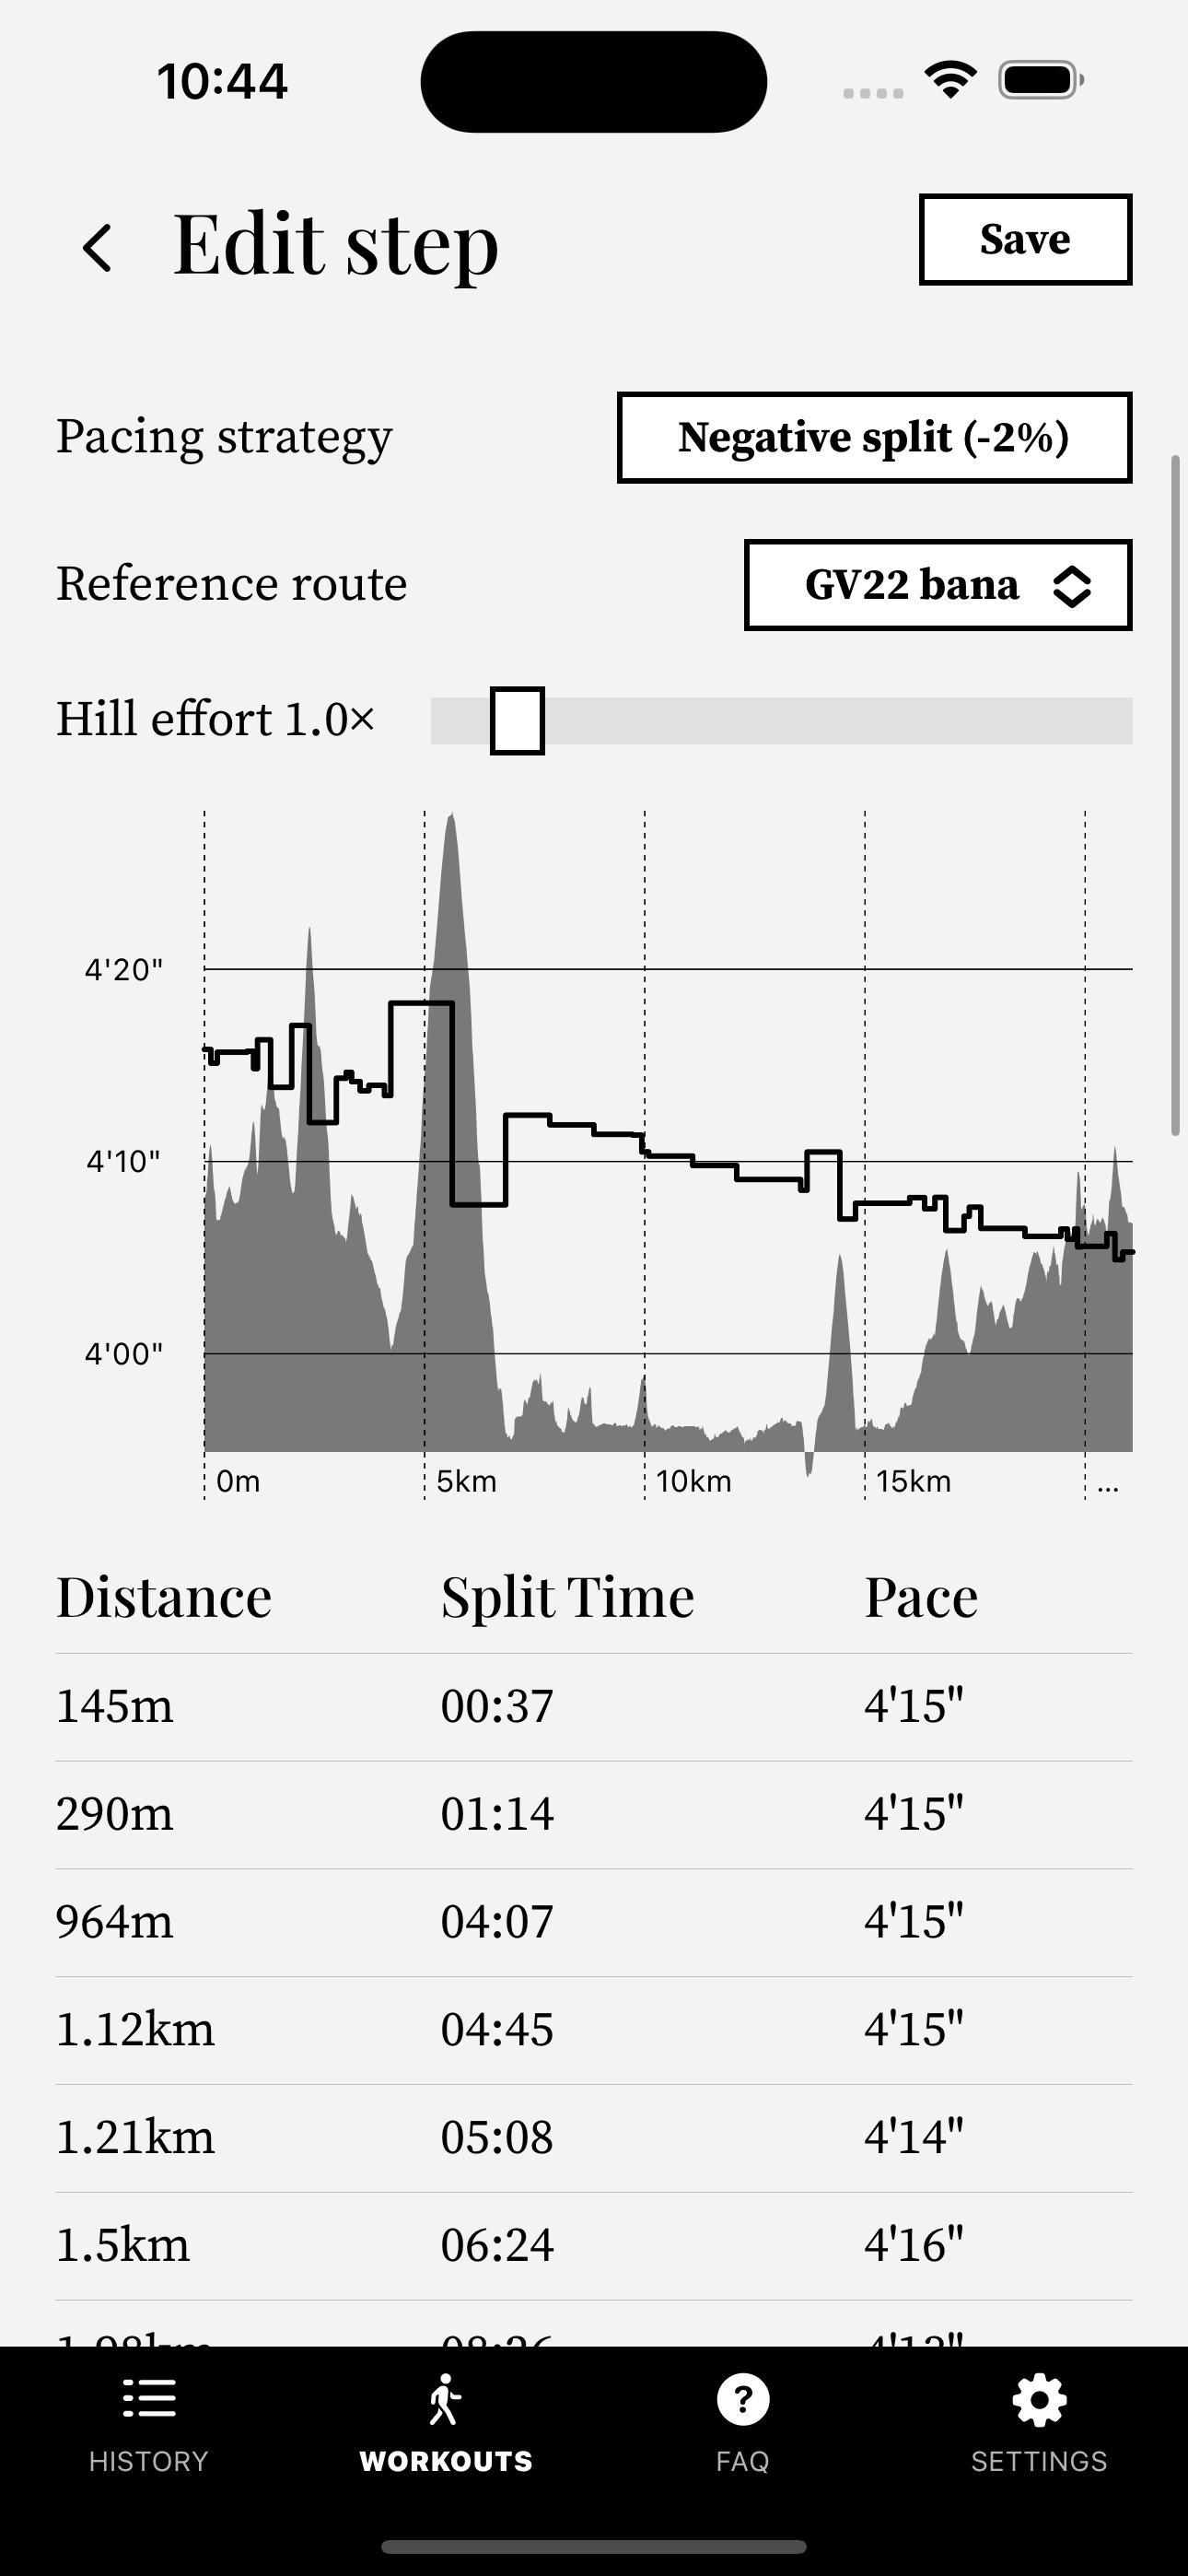
- Notice how the splits are now slower on uphills and faster on downhills. When you select a reference route, the goal distance will automatically update to match that distance. You're free to change it if you'd like after the fact.
- You can drag the Hill Effort slider to make the hill differences larger.
Final words
I hope this post helped you with setting up and understanding pace splits on your Apple Watch. Take care and get ready to hit those PRs!

It's free!